How to Make Passover Matzah Sushi Rolls That Are Crispy, Fun, and Totally Chametz-Free
These Passover matzah sushi rolls are crispy, bite-sized appetizers made by softening matzah, filling it with creamy or savory layers, then rolling and slicing just like sushi — all without rice, soy, or chametz.
I make them every year during Pesach, usually when everyone’s tired of matzah pizza and “just another kugel.”
And honestly? These little roll-ups save the day.
They’ve got crunch. They’ve got flavor. And they feel fun — which, let’s be real, isn’t always easy to pull off during Passover.
The trick is softening the matzah just enough so it rolls without cracking — but still crisps up when chilled or lightly baked. Then I add a simple filling (I usually go avocado-mayo with a sprinkle of herbs), roll it tight, chill it, and slice into sushi-style bites.
They’re great for lunch, snacks, or even as a Seder appetizer.
And best of all? You don’t need anything fancy — just matzah, a few fridge basics, and ten minutes of hands-on time.
I’ll show you exactly how I make them — plus the tips that make them hold together beautifully and taste amazing every time.
Why This Recipe Works (And Why You’ll Actually Make It)
Let’s be real — most Passover recipes check the “kosher” box but miss the “exciting” one.
This one? It hits both.
These matzah sushi rolls give you a fresh option when you’re tired of the same old gefilte fish, matzah lasagna, or dry kugel — or if you’re craving something lighter like this Passover sushi salad, but want it rolled and snackable instead.
They’re quick to make, fun to eat, and actually feel new — which, if you’ve cooked through an entire Pesach week, you know is rare.
I started making them when my family wanted “something crunchy” that still felt like a snack — not another matzah-based casserole. And to my surprise, even the kids were hooked.
You’ll love this recipe if:
-
You want a rice-free, soy-free sushi fix that still looks beautiful on the plate
-
You’re short on time but still want something creative
-
You need something Seder table-friendly or lunchbox-ready
-
You’re craving crunchy, savory bites without turning on the oven for an hour
Plus, they’re easy to fill, easy to roll, and easy to impress with.
And that’s the kind of recipe I keep on repeat.
Ingredients You’ll Need
Let me tell you right now — this isn’t one of those recipes where you toss in whatever’s sitting in your fridge and hope for the best.
These rolls might look playful, but they only come together well when you treat a few ingredients with the right kind of love.
I’ve tested this combo more times than I can count — and while it’s super flexible, the base ingredients I’m about to list? They’re the reason these matzah roll-ups hold together, taste great, and don’t fall apart the second you slice into them.
So grab what you need — and if you’re missing a few of the optional bits, no stress. Just don’t skip the essentials, especially the ones I don’t mess with anymore.
I learn from experience: “If the matzah bends too easily — it’s too wet.
If it cracks — too dry.
You’re looking for that middle spot where it folds like a tortilla… not a puzzle piece.”
How I Make These Rolls – Step by Step
These rolls aren’t complicated — but they do have a rhythm to them.
The first time I made them, I thought: “Okay, it’s just matzah, filling, roll, done.”
But then the matzah cracked. The filling slipped out. And the slices? Sad little triangles.
Since then, I’ve learned what works — and more importantly, what makes this recipe actually fun to make.
If you’ve ever tried something like this Kosher for Pesach Sushi Recipe with Matzah & Quinoa, you’ll recognize that the magic is in how you handle the matzah. So I’ll guide you through exactly how I soften, spread, roll, chill, and slice for that perfect sushi-style bite.
No stress, no rushing. Just follow along — one step at a time — and you’ll be slicing up crispy little matzah roll-ups in no time.
Step 1 – Soften the Matzah (But Not Too Much)
This step right here?
It’s the make-or-break moment.
Too dry and the matzah cracks while rolling.
Too wet and it turns to mush. You need that sweet spot where it bends without tearing.
Here’s how I do it:
I take a rimmed baking sheet (or a wide plate) and pour in just enough warm water to cover the surface — not boiling, just comfortably warm to the touch.
Then I place one sheet of matzah in the water for exactly 8 to 10 seconds. No more.
Once it’s pliable but still holding its shape, I carefully lift it out and place it flat on a clean kitchen towel or a couple layers of paper towel. Let it rest there for a minute or two — it’ll keep softening slightly as it sits.
🧠 Chef Eric’s Note:
“The matzah should feel like a slightly stiff tortilla. If it starts to sag like a wet tissue, you’ve gone too far. I messed this up my first few tries — now I just count slow in my head, lift gently, and trust the towel to do the rest.”
That’s it. Matzah prepped and ready for action.
Step 2 – Make the Filling
This filling is the heart of the roll — simple, creamy, and totally Passover-safe.
It holds everything together and gives you that sushi-style richness in every bite.
Here’s my go-to:
In a small bowl, mash up one ripe avocado until smooth. Add 1 tablespoon of kosher-for-Passover mayo, ½ teaspoon of fresh lemon juice, and a pinch of kosher salt. Stir until it’s light, spreadable, and just a little tangy.
You want it soft enough to spread easily, but not so loose that it runs off the matzah when you roll it.
Optional add-ins?
Sometimes I mix in a few shreds of cooked egg or a sprinkle of chopped dill if I’ve got them on hand. If you’re not keeping it vegetarian, a bit of flaked smoked salmon works great too.
👨🍳Note:
“Think of this like your sushi glue — it adds flavor, binds the roll, and gives you that creamy bite you miss when there’s no rice involved.”
Once that filling’s ready, keep it nearby — we’re about to roll.
Step 3 – Roll It Up and Let It Chill
Alright, time to bring it all together.
Lay your softened matzah sheet flat on a clean surface — I usually use a cutting board or parchment paper. It should feel flexible but still have some structure.
Now take your filling and spread a thin, even layer across the whole surface. Go edge to edge, but don’t pile it on too thick. If you’re adding extras (egg, dill, salmon), sprinkle them over now — not too much, just enough to layer flavor.
Then comes the roll.
Start from one edge and roll it up gently but firmly — like you’re making a jelly roll or burrito. Don’t press too hard. You’re guiding the matzah, not smashing it.
Once rolled, wrap it snugly in plastic wrap or parchment, and place it in the fridge for 10 to 15 minutes.
That quick chill helps it firm up so you can slice it cleanly — without the whole thing unraveling.
Step 4 – Slice & Serve Like a Pro
Once your roll is chilled and firm, it’s slicing time — and trust me, this is where the wow-factor comes in.
Use a very sharp knife, preferably a chef’s knife or serrated edge if that’s what you have. Gently unwrap the roll, place it seam-side down, and slice into ½ to 1-inch rounds. Wipe the blade with a damp towel between cuts — it keeps everything clean and picture-perfect.
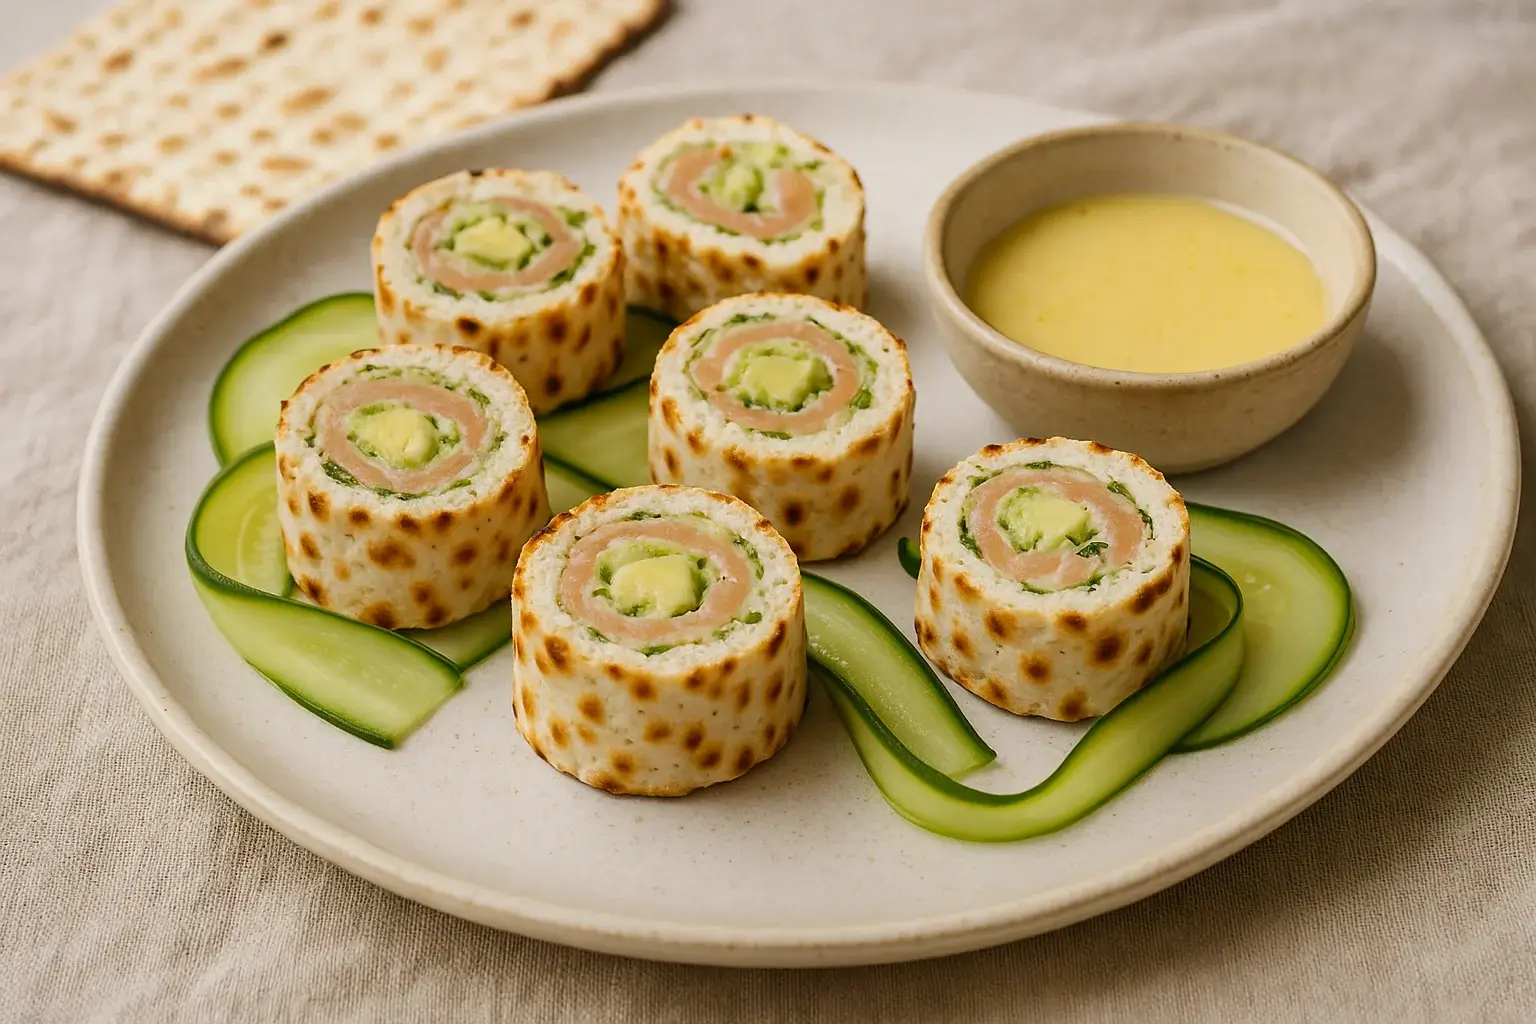
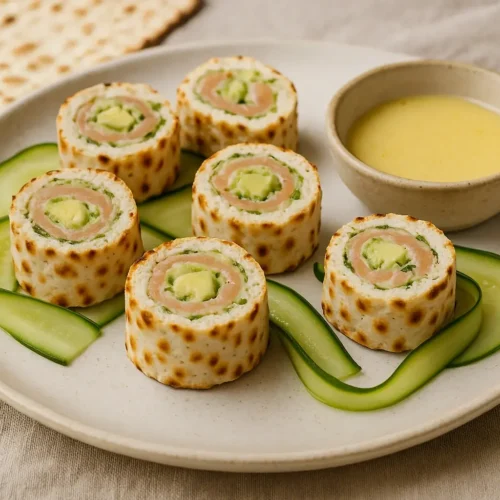
Arrange the sushi bites on a small platter or board. I usually garnish with:
-
A few thin cucumber ribbons
-
A dash of paprika or black sesame seeds (Passover-safe if using)
-
A side of lemon-honey dipping sauce or a dollop of avocado mayo
That’s it — you’ve got crispy, creamy, beautiful little bites ready for the table.
🍽️ Chef Eric’s Serving Tip:
“These are great as a starter at your Seder table, or even packed in a lunchbox with a cold pack. The key is freshness — slice and serve within 2–3 hours for best texture.”
Step 5 – Chill to Set, Then Enjoy
Now that your sushi roll is all wrapped up, it’s time to let it firm up a bit before slicing.
Carefully place the roll on a plate or tray and cover it loosely with plastic wrap or foil. Pop it into the fridge for about 20–30 minutes. This helps the matzah rehydrate just right and the fillings hold together better when slicing.
Prep, Storage & Reheating Guide for Matzah Sushi Rolls
So you’ve made these crispy little bites of Passover joy — now what?
Whether you’re hosting a crowd or meal-prepping for the week, these matzah sushi rolls are surprisingly low-maintenance. I’ve tested them every which way to figure out what holds up, what dries out, and what actually tastes fresh after a day or two.
From prepping ahead to saving leftovers (yes, they reheat better than you’d think), here’s exactly how I make these work beyond just the moment they’re rolled.
Oh — and if you’re looking for even more globally-inspired meal prep ideas, don’t miss these
👉 Costa Rican Easy Recipes — they pair beautifully with lighter bites like these.
How to Prep These Matzah Sushi Bites Like a Pro
If you’re planning ahead — whether it’s for Seder night, a snack board, or just peace of mind — these matzah roll-ups are super prep-friendly.
Here’s how I usually handle it:
-
Soften and roll your matzah early. You can roll them up 2–4 hours before serving.
-
Wrap uncut rolls tightly in plastic wrap — this keeps moisture balanced and the rolls firm.
-
Refrigerate until ready to slice. Let them chill for at least 30 minutes so they slice clean.
-
Slice right before serving if you want them extra crisp and pretty on the plate.
How to Store Leftover Matzah Sushi Bites
If you’ve got extras (lucky you), storing them properly makes all the difference in keeping that texture and flavor intact.
-
Wrap each roll tightly in plastic wrap or beeswax paper to prevent drying out.
-
Place in an airtight container — keep it snug so they don’t unravel.
-
Refrigerate for up to 2 days max. Matzah tends to get soft after that.
-
Avoid freezing. The texture becomes too mushy when thawed.
Reheating (If You Want Them Warm)
While these bites are usually served cold or room temp, some folks love a little warmth — especially when the filling includes melty cheese or roasted veg.
Here’s how I reheat them gently without ruining the crunch:
-
Oven or toaster oven: Preheat to 300°F (150°C) and warm rolls for 4–5 minutes. Don’t overbake — just enough to take the chill off.
-
Avoid microwaving — it turns matzah gummy fast.
-
For air fryer lovers: 300°F for 3 minutes max — quick and crisp.
FAQs – Matzah Sushi Roll-Ups
How long do matzah roll-ups last in the fridge?
They stay fresh for up to 3 days in an airtight container, but taste best within 24 hours.
Can you freeze matzah roll-ups?
Yes, if the filling is freezer-safe. Avoid freezing ones with mayo or avocado—they turn mushy.
What’s the best way to store homemade matzah?
Keep it sealed at room temperature for 2–3 days, or refrigerate for up to 4 days.
Is sushi made with matzah kosher for Passover?
Yes. Swapping seaweed or rice with matzah makes it kosher for Passover.
How do you soften matzah without tearing it?
Soak in warm water for 8–10 seconds, then rest on a towel until soft and rollable.
What can I put inside matzah sushi roll-ups?
Try tuna, avocado, egg, pickled veggies, or beet spread—anything kosher for Passover.
Should I chill matzah rolls before slicing?
Yes, refrigerate for 10–15 minutes to help the rolls firm up and slice cleanly.
How do you reheat matzah roll-ups?
Use an air fryer or toaster oven at 300°F for 2–3 minutes. Avoid microwaving.
Can matzah roll-ups be served warm?
Yes, but they taste best at room temperature or slightly chilled.
Is egg matzah kosher for everyone during Passover?
No. It’s allowed in some traditions, usually for children or elders. Check your custom.
Final Thoughts from My Kitchen to Yours
There’s something about taking an old tradition and folding it into something new — that’s what these matzah roll-ups did for my Passover table. Crunchy, snackable, and totally unexpected, they’ve become one of those recipes my family asks for every year.
Whether you’re hosting a crowd or just want something fun for lunch that doesn’t feel like the same-old matzah, this one’s got you. You don’t need fancy skills, just a few pantry basics, a soft matzah sheet, and a little curiosity.
I’ve tested these bites over several holidays — tweaking, toasting, and taste-testing. Now I’m handing over my exact method to you.
So go ahead. Roll up something delicious. And if you make them, tag me or drop a comment — I’d love to see how your sushi bites turn out.
Chag sameach,
– Chef Eric
Passover Matzah Sushi Rolls
Equipment
- 1 Bowl For mixing filling
- 1 Knife Sharp, for slicing
- 1 Rimmed tray For softening matzah
- 1 Kitchen towel To rest matzah
- 1 Plastic wrap For rolling & chilling
Ingredients
- 2 sheets Plain matzah Pesach-friendly wrapper
- 1 ripe Avocado
- tbsp Kosher-for-Passover mayo
- ½ tsp Fresh lemon juice
- 1 pinch Kosher salt
- 2 slices Smoked salmon (optional) Adds umami (if not vegetarian)
- 2 tbsp Cooked beet or egg shreds (optional) Color & protein
- 1 tbsp Fresh dill or chives (optional) For herby lift
Instructions
- Soften the Matzah: Place matzah in warm water for 8–10 seconds until pliable. Transfer to a towel and let rest for 1–2 minutes.
- Prepare the Filling: In a small bowl, mash avocado. Mix in mayo, lemon juice, and salt until smooth and spreadable.
- Add Optional Mix-ins: Stir in chopped dill, egg, or flaked salmon if using.
- Spread and Roll: Spread filling evenly over softened matzah. Sprinkle any extra toppings, then roll up tightly.
- Chill the Roll: Wrap the roll in plastic or parchment and refrigerate for 15 minutes to firm up.
- Slice and Serve: Use a sharp knife to cut into ½–1 inch slices. Wipe knife between cuts.
- Garnish: Serve with cucumber ribbons, sesame seeds, or dipping sauce if desired.